# 前端常见布局

总结各种页面布局,几乎涵盖了网站所有的布局方式,多种方式实现并分析兼容性。完整地址 (opens new window)
# 水平居中
# 文本/行内元素/行内块级元素
text-align 只控制行内内容(文字、行内元素、行内块级元素)如何相对他的块父元素对齐
.parent {
  text-aligin: center;
}
优缺点
- 优点: 兼容性好
- 缺点: 只对行内内容有效,子元素宽度不能大于父元素宽度,父级必为块状
# 单个块级元素
margin: 0 auto
.son {
  width: 100px;
  margin: 0 auto;
}
优缺点
- 优点: 兼容性好
- 缺点: 必须定宽
# 多个块级元素
父级text-align,子元素全部包起来,然后inline-block
.parent {
  text-align: center;
}
.son {
  display: inline-block;
}
优缺点
- 优点: 兼容性好
- 缺点: 子元素有元素间距
# 绝对定位
.parent{
  width:200px;
  position:relative;
}
.son{
  position:absolute;
  left:50%;
  transform:translateX(-50%); 未知宽度
  /* margin-left:-100px */ 已知宽度
}
优缺点
- 优点: 使用
margin-left兼容性好 - 缺点: 代码较多,脱离文档流,
transform兼容性不好(ie9+)
# flex
.parent {
  display: flex;
  justify-content: center;
}
优缺点
- 优点: 功能强大
- 缺点: pc 端兼容性不好,移动端(Android4.0+)
# 垂直居中
# 单行文本/行内元素/行内块级元素
line-height和height相等
.parent {
  height: 50px;
  line-height: 50px;
}
# 多行文本/行内元素/行内块级元素
line-height和height相等,或者想要显示几行就把line-height设置成高度的几分之几
.parent {
  height: 150px;
  line-height: 30px;
}
# 图片
line-height和height相等,然后font-size:0消除间距
.parent {
  height: 50px;
  line-height: 50px;
  font-size: 0;
}
.son {
  vertical-align: middle;
}
# 单个块级元素
table-cell, 一定要配合vertical-align使用
.parent {
  display: table-cell;
  vertical-align: center;
}
- 绝对定位 老方法父相子绝,
margin-left或者tarnsform
.parent {
  width: 100%;
  height: 100px;
  position: relative;
}
.son {
  position: absolute;
  top: 50%;
  left: 0;
  transform: translateY(-50%);
}
- 使用 flex
.parent {
  display: flex;
  align-items: center;
}
# 任意个元素
.parent {
  display: flex;
  align-items: center;
}
# 水平垂直居中
# 行内/行内块级/图片
line-height和height相等,text-align:center,font-size:0,子元素必须设置vertical-align:middle,如果为块级元素则设置成行内
#parent {
  height: 150px;
  line-height: 150px; /*行高的值与height相等*/
  text-align: center;
  font-size: 0; /*消除幽灵空白节点的bug*/
}
#son {
  /*display: inline-block;*/ /*如果是块级元素需改为行内或行内块级才生效*/
  vertical-align: middle;
}
# table-cell
父级设置table-cell,vertical-align(这个和 table-cell 基本像是绑在一起的),然后如果子类为行内元素,需要设置text-align:center,子类为块级元素,需要在子类样式设置margin 0 auto
踩坑点:
设置 tabl-cell 的元素,宽度和高度的值设置百分比无效,需要给它的父元素设置 display: table; 才生效;
table-cell 不感知 margin,在父元素上设置 table-row 等属性,也会使其不感知 height;
设置 float 或 position 会对默认布局造成破坏,可以考虑为之增加一个父 div 定义 float 等属性;内容溢出时会自动撑开父元素
#parent {
  height: 150px;
  width: 200px;
  display: table-cell;
  vertical-align: middle;
  /*text-align: center;*/ /*如果是行内元素就添加这个*/
}
#son {
  /*margin: 0 auto;*/ /*如果是块级元素就添加这个*/
  width: 100px;
  height: 50px;
}
# button 作为父元素
button 自带 text-align :center,把居中的元素表现形式改为行内或行内块级
.parent {
  width: 100px;
  height: 100px;
  outline: none;
  border: none;
}
.son {
  display: inline-block;
}
# 绝对定位
.parent {
  position: relative;
}
.son {
  position: absolute;
  top: 50%;
  left: 50%;
  transform: translate(-50%, -50%);
  /*定宽 margin-left:负一半宽度 margin-top -height/2*/
}
# 绝对居中
子全屏定位,然后设置 margin:auto
.parent{
  position :relative
}
  .son{
    position :absolute;
    margin :auto;
    width :100px;
    height :50px;
    top :0;
    left :0;
    right :0;
    bottom 0
  }
# flex
```css
  .parent{
    display: flex;
    justify-conetnt :center;
    aligin-items :center
  }

```
# 两列布局(左列定宽,右列自适应)
效果图:

# float+margin
html 代码:
<body>
  <div id="left">左列定宽</div>
  <div id="right">右列自适应</div>
</body>
css 代码:
#left {
  background-color: #f00;
  float: left;
  width: 100px;
  height: 500px;
}
#right {
  background-color: #0f0;
  height: 500px;
  margin-left: 100px; /*大于等于#left的宽度*/
}
# float + margin(fix)
.left{
  width:100px;
  height:500px;
  background:#f00'
  float:left
}
.right-fix{
  float:right;
  width:100%;
  margin-left:-100px
}
.right{
  margin-left:100px;
  height:500px;
  background:#f00
}
# float + overflow
#left {
  background-color: #f00;
  float: left;
  width: 100px;
  height: 500px;
}
#right {
  background-color: #0f0;
  height: 500px;
  overflow: hidden; /*触发bfc达到自适应*/
}
# 绝对定位
#parent {
  position: relative; /*子绝父相*/
}
#left {
  position: absolute;
  top: 0;
  left: 0;
  background-color: #f00;
  width: 100px;
  height: 500px;
}
#right {
  position: absolute;
  top: 0;
  left: 100px; /*值大于等于#left的宽度*/
  right: 0;
  background-color: #0f0;
  height: 500px;
}
# table-cell 实现
# flex
#parent {
  width: 100%;
  height: 500px;
  display: flex;
}
#left {
  width: 100px;
  background-color: #f00;
}
#right {
  flex: 1; /*均分了父元素剩余空间*/
  background-color: #0f0;
}
# 两列布局(左列自适应,右列定宽)
# float+margin
# float+overflow
# table-cell
# 绝对定位
# flex
# 两列布局(一列不定宽,一列自适应)
# float + overflow
# flex
# 三列布局(两列定宽 一列自适应)
效果图:

# float+margin
html 代码:
<body>
  <div id="parent">
    <div id="left">左列定宽</div>
    <div id="center">中间定宽</div>
    <div id="right">右列自适应</div>
  </div>
</body>
#parent {
  min-width: 310px; /*100+10+200,防止宽度不够,子元素换行*/
}
#left {
  margin-right: 10px; /*#left和#center间隔*/
  float: left;
  width: 100px;
  height: 500px;
  background-color: #f00;
}
#center {
  float: left;
  width: 200px;
  height: 500px;
  background-color: #eeff2b;
}
#right {
  margin-left: 320px; /*等于#left和#center的宽度之和加上间隔,多出来的就是#right和#center的间隔*/
  height: 500px;
  background-color: #0f0;
}
# float+overflow
#parent {
  min-width: 320px; /*100+10+200+20,防止宽度不够,子元素换行*/
}
#left {
  margin-right: 10px; /*间隔*/
  float: left;
  width: 100px;
  height: 500px;
  background-color: #f00;
}
#center {
  margin-right: 10px; /*在此定义和#right的间隔*/
  float: left;
  width: 200px;
  height: 500px;
  background-color: #eeff2b;
}
#right {
  overflow: hidden; /*触发bfc*/
  height: 500px;
  background-color: #0f0;
}
# flex
#parent {
  height: 500px;
  display: flex;
}
#left {
  margin-right: 10px; /*间距*/
  width: 100px;
  background-color: #f00;
}
#center {
  margin-right: 10px; /*间距*/
  width: 200px;
  background-color: #eeff2b;
}
#right {
  flex: 1; /*均分#parent剩余的部分达到自适应*/
  background-color: #0f0;
}
# table
# 三列布局(两侧定宽,中间自适应)
# 双飞翼布局

关键
- center 盒放最前面,且包一层 div,一定要设置 width:100%,否则无法自适应
- left 区块需要用
margin-left:-100%来提前占位置 - right 区块也要占位
margin-left:-width - center 子元素设置 height ,margin 0 220px 0 120px 左右和宽度再多出间隔
<body>
  <div id="header"></div>
  <!--中间栏需要放在前面-->
  <div id="parent">
    <div id="center">
      <div id="center_inbox">中间自适应</div>
      <hr />
      <!--方便观察原理-->
    </div>
    <div id="left">左列定宽</div>
    <div id="right">右列定宽</div>
  </div>
  <div id="footer"></div>
</body>
css 代码
#header {
height: 60px;
background-color: #ccc;
}
#left {
float: left;
width: 100px;
height: 500px;
margin-left: -100%; /_这里一定是-100%,提前占位置_/
background-color: #f00;
}
#center {
height: 500px;
float: left;
width: 100%;
background-color: #eeff2b;
}
#center*inbox{
height: 580px;
margin: 0 220px 0 120px; /*关键!!!左右边界等于左右盒子的宽度,多出来的为盒子间隔*/
}
#right {
float: left;
width: 200px;
height: 500px;
margin-left: -200px; /*使 right 到指定的位置,值等于自身宽度*/
background-color: #0f0;
}
#footer {
clear: both; /*注意清除浮动!!\_/
height: 60px;
background-color: #ccc;
}
# 圣杯布局
效果图如上双飞翼:
圣杯布局关键
- 容器盒通过设置
padding提前给左右两边盒子流出宽度大小的位置 - left 不仅要设置
margin-left:-100%,还要设置相对定位,left(负值)值大于或等于宽度,多出来的为间隔 - right
margin-left -width,relative,left:width+
<body>
<div id="header"></div>
<div id="parent">
    <!--#center需要放在前面-->
    <div id="center">中间自适应
        <hr>
    </div>
    <div id="left">左列定宽</div>
    <div id="right">右列定宽</div>
</div>
<div id="footer"></div>
</body>
#header {
  height: 60px;
  background-color: #ccc;
}
#parent {
  box-sizing: border-box;
  height: 500px;
  padding: 0 215px 0 115px; /*为了使#center摆正,左右padding分别等于左右盒子的宽,可以结合左右盒子相对定位的left调整间距*/
}
#left {
  margin-left: -100%; /*使#left上去一行*/
  position: relative;
  left: -115px; /*相对定位调整#left的位置,正值大于或等于自身宽度*/
  float: left;
  width: 100px;
  height: 500px;
  background-color: #f00;
  opacity: 0.5;
}
#center {
  float: left;
  width: 100%; /*由于#parent的padding,达到自适应的目的*/
  height: 500px;
  box-sizing: border-box;
  border: 1px solid #000;
  background-color: #eeff2b;
}
#right {
  position: relative;
  left: 215px; /*相对定位调整#right的位置,大于或等于自身宽度*/
  width: 200px;
  height: 500px;
  margin-left: -200px; /*使#right上去一行*/
  float: left;
  background-color: #0f0;
  opacity: 0.5;
}
#footer {
  height: 60px;
  background-color: #ccc;
}
# table-cell
.parent {
  display: table;
  height: 300px;
}
.left {
  display: table-cell;
  width: 100px;
  background: #f00;
}
.center {
  display: table-cell;
  background: yellow;
}
.right {
  display: table-cell;
  width: 200px;
  background: #f0f;
}
# flex
.parent {
  display: flex;
  height: 300px;
}
.left {
  width: 100px;
  background: #f0f;
}
.center {
  flex: 1;
  background: #f00;
}
.right {
  width: 200px;
  background: red;
}
# 绝对定位
.parent {
  position: relative;
  min-width: 300px;
  height: 300px;
}
.left {
  position: absolute;
  left: 0;
  top: 0;
  width: 100px;
  height: 300px;
  background: #f0f;
}
.center {
  height: 300px;
  background: yellow;
}
.right {
  position: absolute;
  right: 0;
  top: 0;
  width: 200px;
  height: 300px;
  background: #f00;
}
# 多列等宽布局
# float
<body>
  <div id="parent">
    <div class="column">
      1
      <p>我是文字我是文字我输文字我是文字我是文字</p>
    </div>
    <div class="column">
      2
      <p>我是文字我是文字我输文字我是文字我是文字</p>
    </div>
    <div class="column">
      3
      <p>我是文字我是文字我输文字我是文字我是文字</p>
    </div>
    <div class="column">
      4
      <p>我是文字我是文字我输文字我是文字我是文字</p>
    </div>
  </div>
</body>
#parent {
  margin-left: -20px; /*使整体内容看起来居中,抵消padding-left的影响*/
}
.column {
  padding-left: 20px; /*盒子的边距*/
  width: 25%;
  float: left;
  box-sizing: border-box;
  border: 1px solid #000;
  background-clip: content-box; /*背景色从内容开始绘制,方便观察*/
  height: 500px;
}
.column:nth-child(odd) {
  background-color: #f00;
}
.column:nth-child(even) {
  background-color: #0f0;
}
# flex
#parent {
  margin-left: -15px; /*使内容看起来居中*/
  height: 500px;
  display: flex;
}
.column {
  flex: 1; /*一起平分#parent*/
  margin-left: 15px; /*设置间距*/
}
.column:nth-child(odd) {
  background-color: #f00;
}
.column:nth-child(even) {
  background-color: #0f0;
}
# table-cell
# 九宫格布局
# CSS 画三角形
div {
  width: 0;
  height: 0;
  border-width: 20px;
  border-style: solid;
  border-color: transparent transparent red transparent;
}
# CSS 画扇形
div {
  width: 0;
  height: 0;
  border-width: 20px;
  border-style: solid;
  border-color: transparent transparent red transparent;
  border-radius: 50%;
}
# 一个满屏 品 字布局如何设计?
上面的 div 设置成 100%,下面的 div 分别宽 50%,然后使用 float 或者 inline 使其不换行。
# 移动端适配问题
- flex 弹性布局
- viewport 适配
<meta
  name="viewport"
  content="width=device-width; initial-scale=1; maximum-scale=1; minimum-scale=1; user-scalable=no;"
/>
rem 适配,(rem 和 em 区别在于 rem 字体大小是相较于 HTML 根元素的,em 是相较于该元素的父级元素的)
vw,vh 布局(vh、vw 方案即将视觉视口宽度 ,视觉视口高度)
建议使用 postcss-px-to-viewport 将 px 转为 vw
# 移动端适配流程
- 在 head 设置 width=device-width 的
viewport - 在 css 中使用 px
- 在适当的场景使用
flex布局,或者配合vw进行自适应 - 在跨设备类型的时候(pc <-> 手机 <-> 平板)使用
媒体查询 - 在跨设备类型如果交互差异太大的情况,考虑
分开项目开发
# 移动端 300ms 延迟的原因以及解决方案
移动端点击有 300ms 的延迟是因为移动端会有双击缩放的这个操作,因此浏览器在 click 之后要等待 300ms,看用户有没有下一次点击,来判断这次操作是不是双击。
解决方案:
- 通过 meta 标签禁用网页的缩放。
<meta name="viewport" content="user-scalable=no" />
- 更改默认的视口宽度
<meta name="viewport" content="width=device-width" />
- 调用一些 js 库,比如 FastClick
# 动手实现一个左右固定 100px,中间自适应的三列布局?(至少三种)
# 屏幕占满和未占满的情况下,使 footer 固定在底部,尽量多种方法
# Css 实现 div 宽度自适应,宽高保持等比缩放
https://www.cnblogs.com/qianxiaox/p/13841033.html (opens new window)
- vw
- 提前使用
padding-bottom占位,值为图片原始比例。图片和 div 宽度都设为 100%
# Css 实现多列等高布局,要求元素实际占用的高度以多列中较高的为准
实际上就是多列布局
# 给了一个具体的需求让写 html+css,需求大概是模块水平垂直居中对齐+不定高,按文字自适应+带灰色遮罩+弹出动画(实现一个弹框,带遮罩层)
# 进度条加载动画
.loading {
  width: 200px;
  height: 200px;
  border-radius: 50%;
  border: 20px solid #f3f3f3;
  border-top: 20px solid red;
  animation: loading 2s linear infinite;
}
@keyframes loading {
  0% {
    transform: rotate(0deg);
  }
  100% {
    transform: rotate(360deg);
  }
}
# 移动端上下固定,中间自适应滚动布局方案
<body
  > <div
  class="wrap"
  > <div
  class="header"
  > header</div
  > <div
  class="main"
  > 弹性滚动区域
  </div
  > <div
  class="footer"
  > footer</div
  > </div
  > </body
  > html,
body {
  height: 100%;
}
.wrap {
  display: -webkit-box;
  display: -webkit-flex;
  display: -ms-flexbox;
  display: flex;
  -webkit-box-orient: vertical;
  -webkit-flex-direction: column;
  -ms-flex-direction: column;
  flex-direction: column;
  width: 100%;
  height: 100%;
}
.header,
.footer {
  height: 40px;
  line-height: 40px;
  background-color: #d8d8d8;
  text-align: center;
}
.main {
  -webkit-box-flex: 1;
  -webkit-flex: 1;
  -ms-flex: 1;
  flex: 1;
  width: 100%;
  overflow: auto; /* winphone8和android4+ */
  -webkit-overflow-scrolling: touch; /* ios5+ */
}
# 实现仿百度输入框,带有输入提示
原生写法
<!DOCTYPE html>
<html lang="zh-CN">
  <head>
    <meta charset="UTF-8" />
    <title>Document</title>
  </head>

  <style>
    #kw {
      width: 284px;
      height: 30px;
      border: 2px solid #333333;
      line-height: 30px;
      font-size: 16px;
      box-sizing: border-box;
      padding: 0 5px;
    }
    #append {
      width: 286px;
      box-sizing: border-box;
      border: 2px solid #333333;
      border-top: 0;
      display: none;
    }
    #append .item:hover {
      background-color: aqua;
      cursor: pointer;
    }
    .item {
      padding: 3px 5px;
      cursor: pointer;
    }
  </style>

  <body>
    <div id="content">
      <input id="kw" onkeyup="getContent(this);" placeholder="请输入" />
      <div id="append"></div>
    </div>
  </body>

  <script>
    let data = [
      "你好,我是Michael",
      "你是谁",
      "你最好啦",
      "你最珍贵",
      "你是我最好的朋友",
      "你画我猜",
      "你是笨蛋",
      "你懂得",
      "你为我着迷",
      "你是我的眼"
    ];
    /**
     * let xhr = new xmlHttpRequest()
     * xhr.open('GET','url',true)
     * xhr.onreadystatechange=()=>{
     * if(xhr.readyState === 4){
     * xhr.status === 200 &&& console.log(xhr.responseText)
     * }
     * }
     * xhr.send()
     *
     * xhr.open('POST','url',true)
     *
     * xhr.setRequestHeader('Content-type','application/x-www-form-urlencoded')
     *
     * xhr.send('a=1&b=2')
     * */

    let input = document.getElementById("kw");
    let append = document.getElementById("append");

    function getContent(obj) {
      let inputValue = obj.value.trim();
      // 首先为空值的情况,append不展示
      if (inputValue === "") {
        append.style.display = "none";
        append.innerHTML = "";
        return;
      }
      // 有值的情况下,遍历data,如果命中里面的数据,就创建一个item的html,并且么个都绑定点击事件
      let html = "";
      for (let i = 0; i < data.length; i++) {
        if (data[i].indexOf(inputValue)) {
          html += "<div class='item' onClick='getCon(this);'>" + data[i] + "</div>";
        }
      }
      if (html !== "") {
        append.style.display = "block";
        append.innerHTML = html;
      }
    }
    function getCon(obj) {
      input.value = obj.innerText;
      append.style.display = "none";
      append.innerHTML = "";
    }
  </script>
</html>
# 实现一个弹窗组件
Vue 写法
弹窗层组件分为: 遮罩层 + 内容层
<template>
  <div class="modal-background" v-show="show">
    <div class="modal-wrapper">
      <div class="modal-header">
        {{ title }}
      </div>
      <div class="modal-content">
        <slot></slot>
      </div>
      <div class="modal-footer">
        <button type="button" @click="confirm" class="btn  confirm">确定</button>
        <button type="button" @click="cancel" class="btn cancel">取消</button>
      </div>
    </div>
  </div>
</template>

<script>
export default {
  name: "",
  props: {
    show: {
      type: Boolean,
      default: false
    },
    title: {
      type: String,
      default: "弹窗标题"
    }
  },
  methods: {
    confirm() {
      this.$emit("onConfirm");
    },
    cancel() {
      this.$emit("onCancel");
    }
  }
};
</script>
<style scoped>
.modal-background {
  position: fixed;
  left: 0;
  top: 0;
  bottom: 0;
  width: 100%;
  height: 100%;
  background: rgba(0, 0, 0, 0.5);
  z-index: 10;
}
.modal-wrapper {
  display: flex;
  flex-direction: column;
  width: 400px;
  height: 200px;
  position: fixed;
  left: 50%;
  top: 50%;
  transform: translate(-50%, -50%);
}
.modal-header {
  height: 60px;
  line-height: 60px;
  background: #ffffff;
  border-bottom: 1px solid #000000;
}
.modal-footer {
  display: flex;
  justify-content: center;
  align-items: center;
  padding-bottom: 20px;
}

.btn {
  display: inline-block;
  text-align: center;
  vertical-align: middle;
  font-size: 14px;
  font-weight: 400;
  padding: 12px 20px;
  border: 1px solid transparent;
  line-height: 1;
  border-radius: 4px;
  cursor: pointer;
  user-select: none;
  outline: none;
}

.confirm {
  background: #007bff;
  color: #ffffff;
  border-color: #007bff;
  margin-right: 15px;
}
.cancel {
  border-color: #dcdfe6;
  background-color: #fff;
  color: #606266;
}
</style>
使用组件

# 顶部高度不定需要固定,底部需要自适应,而且超出滚动
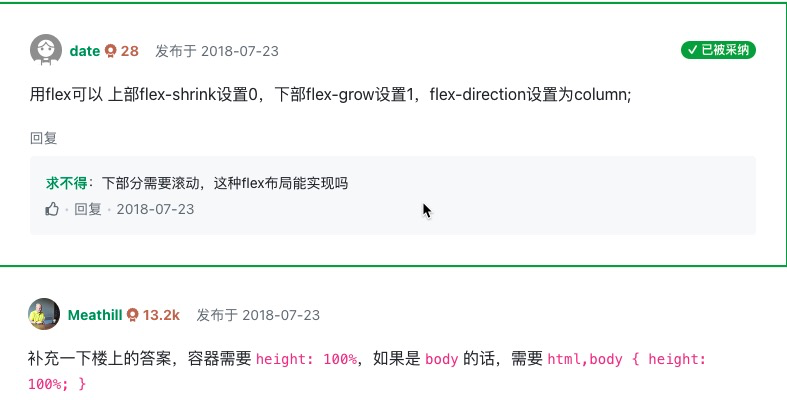
.course-content {
  display: flex;
  flex-direction: column;
  height: 100vh;
}

.course-head {
  flex-shrink: 0;
}

.course-card {
  flex-grow: 1;
  overflow: scroll;
  -webkit-overflow-scrolling: touch; // 开启ios滚动硬件加速,否则很卡会被认为是bug
}